How do I add contacts and create audiences in Co-Kinetic?
This is part of the Clinic Growth Hub subscription.
Sound familiar?
Your patient list lives in your practice management system, or Mailchimp, or a spreadsheet, and you want it in Co-Kinetic without a weekend of copy-paste. Or the contacts are in but you are not sure how to email just the right slice of them. Two halves, one guide: getting people IN (contacts) and grouping them (audiences) 📇.
What's happening
The Import Contacts wizard takes a CSV file in any column layout, no template, no renaming, up to 50,000 rows, checks every email address is genuinely deliverable, and merges safely with people you already have. Audiences are saved, rule-based answers to "who should get this?": they re-check themselves against your live contacts every time they are used, so someone who newly qualifies is included automatically.
Why it works this way
A list is only as good as its deliverability and its slicing. Verification up front cuts down bounces (and an address you have already verified is never charged for again); rule-based audiences are why you never rebuild a list by hand again: tag someone tomorrow and they qualify tomorrow 🙂.
What to do now
Part 1: bringing your list in:
- Export your contacts from wherever they live as a CSV file (a spreadsheet like Excel can save as CSV in one step). Any column layout is fine, as long as the first row holds your column headings.
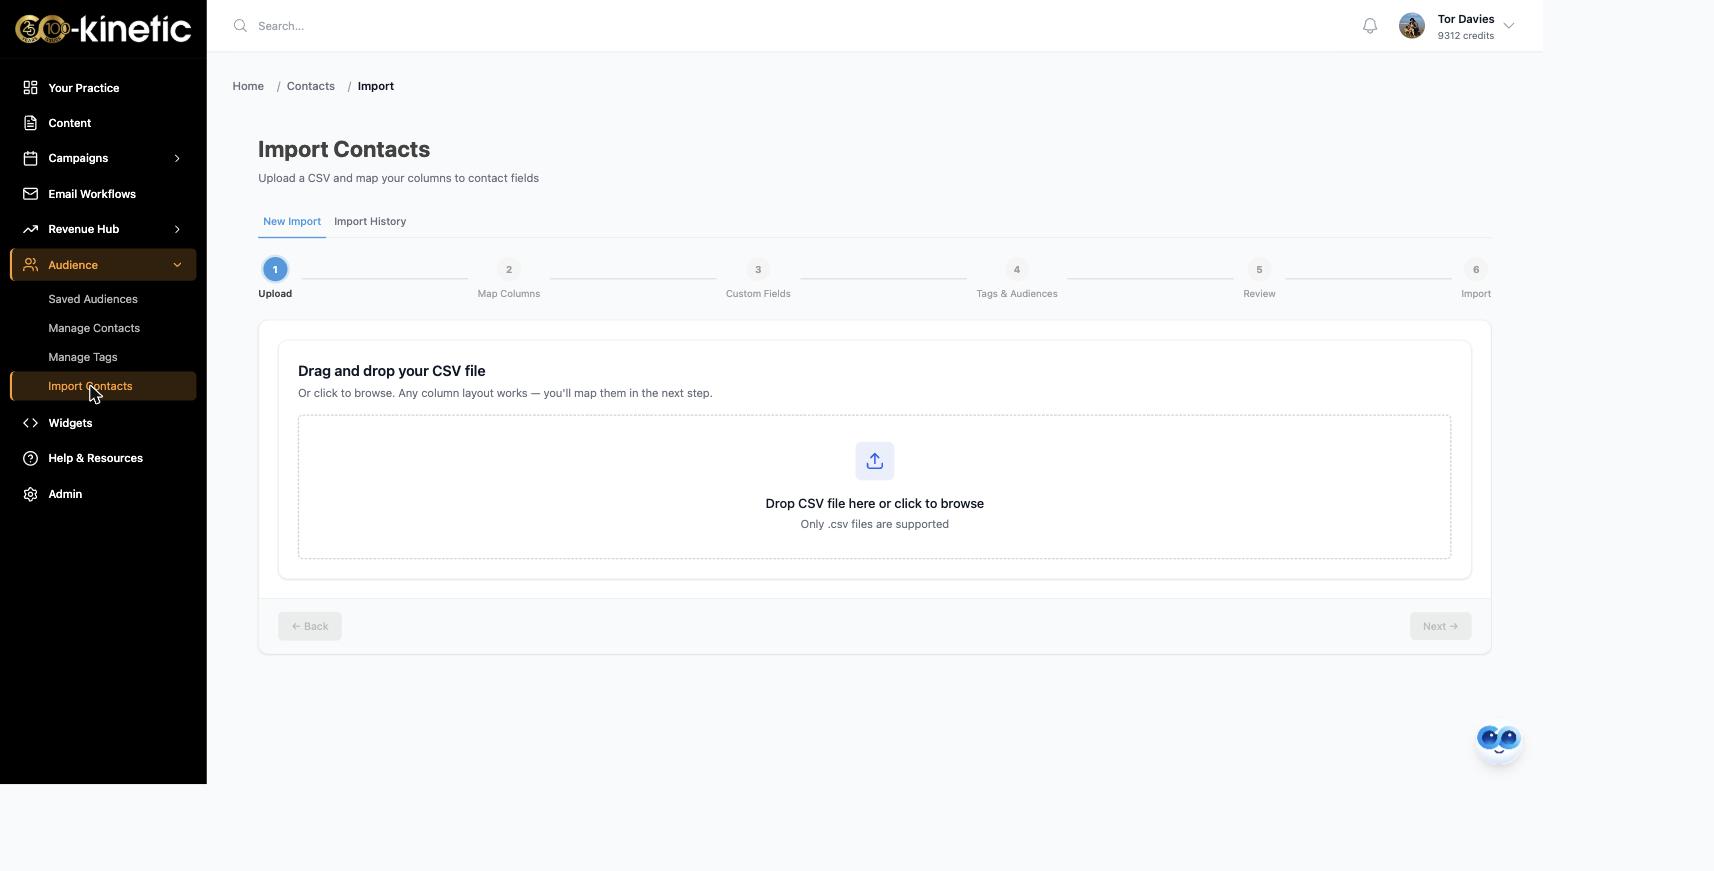
- Click Audience in the left-hand menu, then Import Contacts. On the New Import tab, drag your file in. You will see a File Preview (first 5 rows) plus row and column counts: treat the preview as a rough check rather than gospel, and confirm the important columns on the next step.
- The wizard runs six steps: Upload, Map Columns, Custom Fields, Tags & Audiences, Review, Import.
- On Map Columns, your columns are on the left; pick what each becomes: Email, First name, Phone, Last appointment, Postcode, or Opted out (mapping an Opted out column suppresses those people from marketing). Recognised columns arrive pre-matched with a green Auto-matched tick; anything unwanted goes to Do not import. One column must map to Email.
- On Custom Fields, turn any non-standard column (say, "membership type") into a permanent field of your own, types are Text, Number, Date, Email, URL, Yes/No or Dropdown, usable on contacts and in audience filters ever after.
- On Tags & Audiences, optionally tag everyone in the import (tags are lowercase-with-hyphens, like
nurture-campaign-emails). You can also add the import to a saved audience, but know that this can start emails going out: if that audience feeds a workflow or promotion, the new contacts can be enrolled automatically. Tick it only when that is exactly what you want. - On Review, check the summary, confirm the date format if a column is ambiguous (DD/MM or MM/DD), then click Import. You can leave the page, but do glance at Import History later rather than assuming: an import that sits on "in progress" for an unusually long time needs a nudge to us in the chat.
- The Import Complete screen shows Imported, Updated (merged) and Skipped. Give the numbers a moment: they can briefly show low and then climb as the final rows settle. Merged contacts have blank fields filled from your file, never overwritten, and tags always added. Skipped rows come in three kinds: no email address, an email that failed the deliverability check, or a missing first name. Download skipped rows lists the first two kinds with reasons; missing-name skips are counted but not listed, so the skipped number can be higher than the download.
Adding people one at a time: ➕ Add a New Person on the Manage Contacts page (titled "Your Audience") (first name, last name, email; phone, date of birth and tags optional: the email is verified before the contact is created). The older 📄 Upload a Spreadsheet button on the same page needs a set template and caps at 5,000 rows; the wizard is the recommended route.
Part 2: creating audiences:
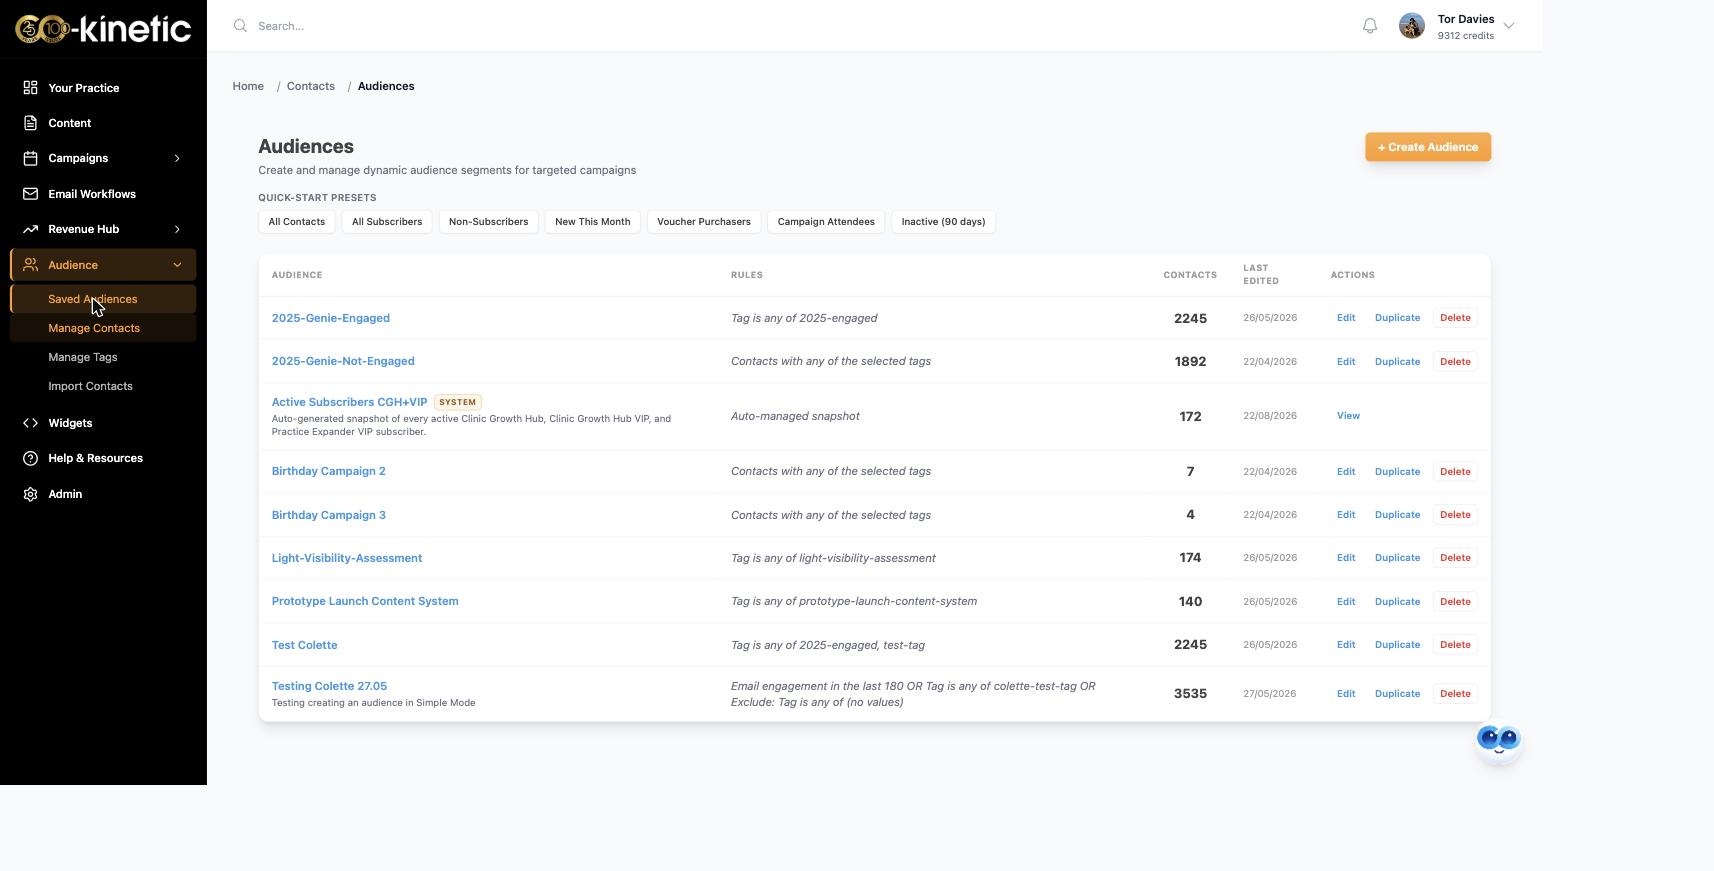
- Click Audience in the left-hand menu, then Saved Audiences, then + Create Audience (or start from a quick-start preset chip, All Contacts, All Subscribers, Voucher Purchasers and more, and adjust).
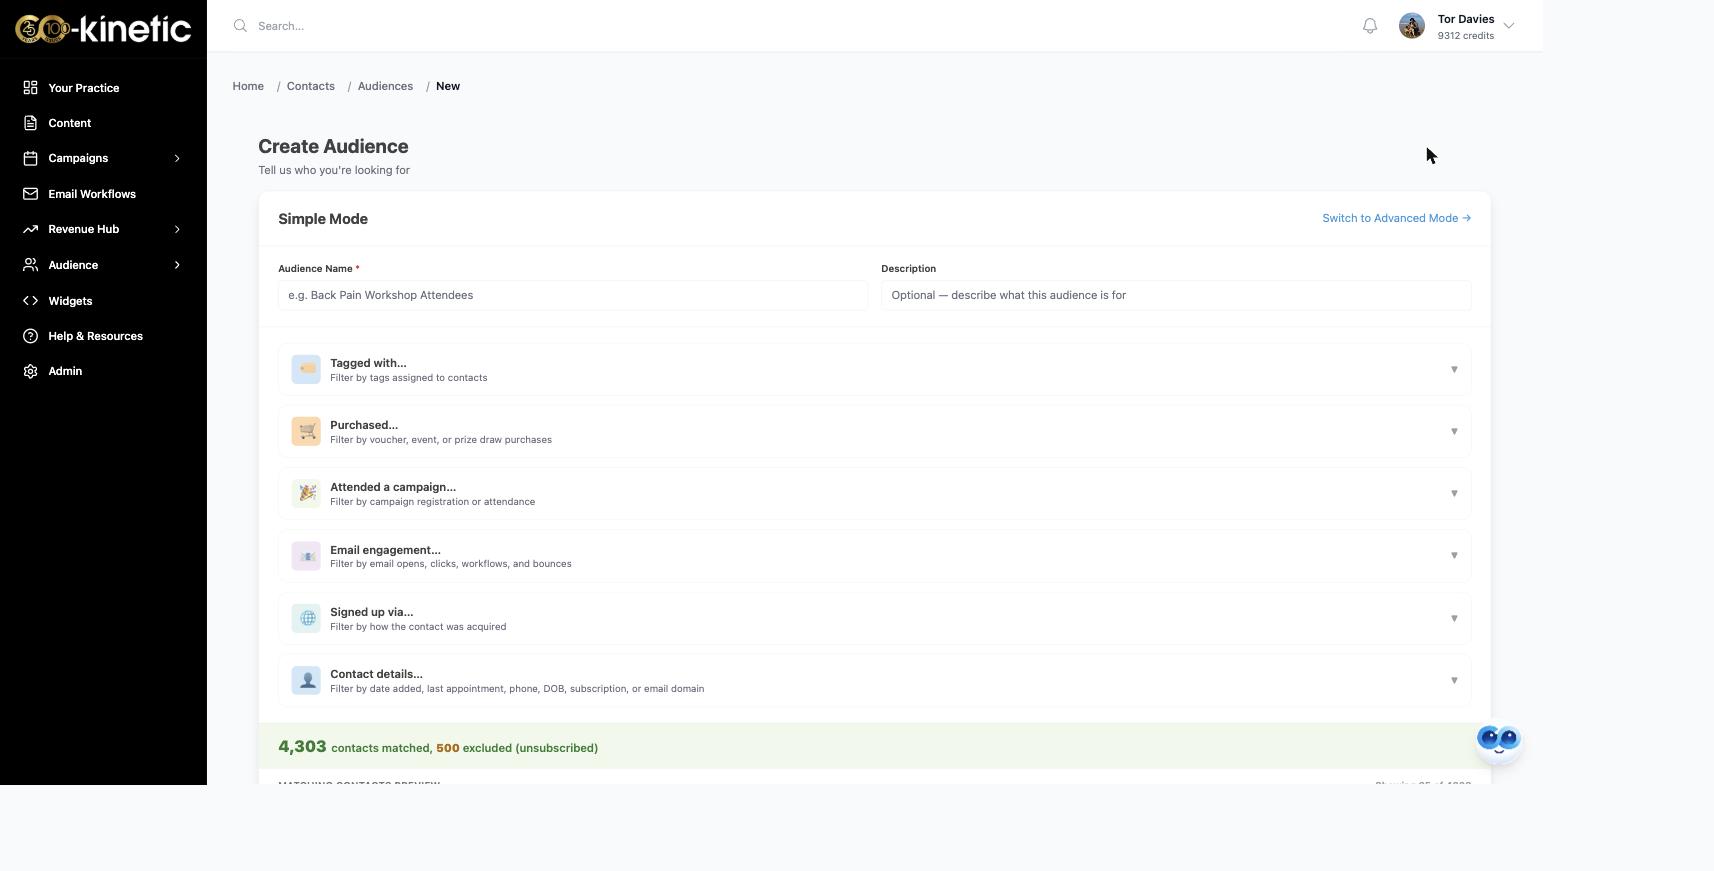
- Name it after its purpose (there is an optional description box too), then describe who you want with the six Simple Mode filter cards: Tagged with… / Purchased… / Attended a campaign… / Email engagement… / Signed up via… / Contact details… Each card has an Include / Exclude switch, so "opened but did not click" is an Include-opened card plus an Exclude-clicked card. The Email engagement card is the powerhouse: opened, clicked, bounced, unsubscribed, received, enrolled, workflow status, open and click counts: over any time window, against any or one specific workflow or email.
- Watch the live count as you build: the green bar shows current matches, the preview table shows a sample of real people, and unsubscribed matches are called out: they stay countable but are automatically left out at sending time.
- Click Save Audience. Pick it anywhere you choose recipients from now on; it keeps itself current.
The question behind the question
"Will importing mess up the contacts I already have?" This is the fear that keeps clinic lists trapped in old systems, and the merge rules are built for it: an existing contact is never overwritten, only their blank fields are filled, nothing is deleted, and every import is kept in Import History with its original file downloadable. Opt-outs carry across properly too: if your file marks a contact as opted out, that suppression is applied whether they are brand new or already in your list. One deliberate safety rule in the other direction: an import never un-suppresses anyone: someone who has opted out stays opted out, whatever a later file says 🛟.
The next question is usually...
- How do I create a nurture email workflow?
- How do I create an email collection form and add it to my website?
- Why do my email addresses need verifying, and how do I keep my list clean?
Still stuck? This usually means...
- Your skipped count seems high. Download the skipped rows: dead and undeliverable addresses are dropped on purpose to cut down bounces, and a list that has not been emailed for years can lose a real chunk. That is the list getting honest, not broken.
- An audience count looks wrong. Open the audience and read the green bar's breakdown: unsubscribed matches are counted but excluded from sends, which explains most surprises. Genuinely odd? Tell us in the chat with the audience name.
- You want to undo an import. One-click undo does not exist yet (it is on the list). Import History holds exactly what came in; tell us in the chat and we will help unpick it.